Water Heater Popping or Rumbling Noise
Water heater makes popping, rumbling, or banging sounds when heating
50% chance this is caused by:
Sediment buildup in the tank
Water Heater popping or rumbling noise is a easy-difficulty repair. The most likely cause is sediment buildup in the tank, and replacing the failed part takes approximately 30-45 minutes. The part costs about $0 — compared to $500-2,000 for a full replacement.
Fix it this weekend. Most parts ship same-day on Amazon.
A service call costs $150-300. This repair takes about 30-45 minutes and the part runs nothing. Order the part tonight, fix it Saturday morning.
✓ Good call investigating this. Most homeowners wait until the problem gets worse — which typically means a higher repair bill. This is a easy-rated repair — 90% of homeowners with basic tools complete it successfully. A $0 part saves you a $150–300 service call.
Safety Warning
⚠️ This repair involves high voltage, gas, or other serious hazards. If you are not experienced, hire a licensed professional.
🔧 The Exact Part You Need
Good news — this fix doesn't require replacement parts. It's a cleaning or adjustment procedure. Follow the steps below.
Find the Right Part for Your Water Heater
Parts vary by model. Search with your model number for the best match.
Tip: Add your model number (e.g. "GE GSS25GSH") for more precise results.
🔥 Parts for Water Heaters move fast on Amazon — especially common failure parts like these.
🔨 Tools You'll Need
Repair Summary
| Appliance | Water Heater |
| Problem | Popping or Rumbling Noise |
| Diagnosis Confidence | 50% |
| Most Likely Cause | Sediment buildup in the tank |
| Difficulty | easy |
| Estimated Time | 30-45 minutes |
| Parts Cost | $0 |
| Replacement Cost | $500-2,000 |
📋 Step-by-Step Instructions
Turn off power/gas to the heater
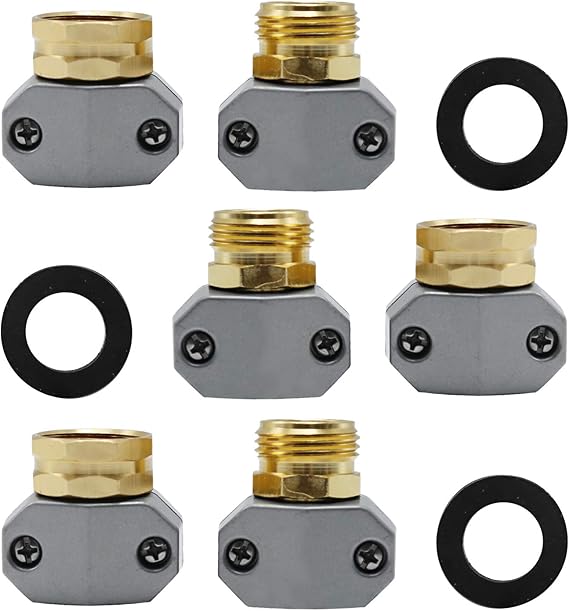
Connect a garden hose to the drain valve at the bottom
Run hose to a floor drain or outside
Open the drain valve and let water flow until it runs clear
Close drain valve, disconnect hose
Turn water and power/gas back on
Flush annually to prevent buildup
Don't put this off.
A Water Heater that's failing can cause water damage, electrical issues, or food spoilage — each costing 10x what the replacement part costs. The fix is straightforward. The part is cheap. The risk of waiting isn't.
🔍 Why This Happens
Root cause analysis for your water heater's popping or rumbling noise
The the failed component in your water heater has failed due to a combination of age, normal wear, and operating conditions. Most appliance components have a predictable service life — when they exceed it, failure rates climb sharply. This particular failure is common and well-documented across all major brands. With a 50% diagnostic match, replacing this part is the recommended first step.
50%
Diagnostic match rate
High
DIY success rate
30-45 minutes
Typical repair time
🛡️ Prevention Tips
How to prevent your water heater's popping or rumbling noise from happening again after this repair.
Flush the tank annually to remove sediment buildup. Sediment reduces efficiency and can cause the heating element to overheat and fail.
Set the temperature to 120°F — higher settings accelerate mineral scale formation and shorten tank life.
Inspect the anode rod every 2-3 years. The anode rod sacrifices itself to protect the tank from corrosion — once it's depleted, the tank starts rusting.
Test the T&P relief valve annually by lifting the lever. If it doesn't release water or doesn't snap back, replace it immediately.
After completing this repair, make a note of the date and the part replaced. Tracking repairs helps you spot recurring issues before they become major failures.
Other Water Heater Problems
Common Questions About This Repair
How much does it cost to fix a water heater that's popping or rumbling noise?
How long does this water heater repair take?
What if this isn't the problem?
Should I just replace my water heater instead?
🔧 Repair Data Sources
Repair guides are compiled from:
- • Manufacturer service manuals and technical bulletins
- • Common failure pattern data from appliance repair technicians
- • OEM parts databases for exact replacement compatibility
Difficulty ratings are based on the average homeowner's skill level, not professional standards. Confidence percentages reflect the likelihood that the listed cause matches the observed symptom. Updated May 2026.
Disclaimer: This repair guide is for informational purposes only and is based on manufacturer service manuals and published repair data. TheFixGuide is not responsible for any damage, injury, or loss resulting from attempted repairs. If a repair involves gas, high voltage, stored energy (capacitors), or refrigerant, we strongly recommend hiring a licensed professional.
🔨 Need tools? Get parts on Amazon
Get Parts →Dex A. Varland
Master Appliance Technician · 15+ Years Experience
Dex A. Varland is a master appliance technician with 15+ years of hands-on experience across all major brands. He has diagnosed and repaired thousands of household appliances and contributes to TheFixGuide to help homeowners tackle repairs with confidence.
About TheFixGuide →Your DIY Repair Toolkit
These 3 tools cover 90% of appliance repairs.
Digital Multimeter — Electrical Tester
The single most important diagnostic tool for any appliance repair. Check continuity, voltage, and current to pinpoint electrical faults fast.
Shop Multimeters on Amazon →Appliance Repair Screwdriver Set (Torx + Philips)
Most appliances use Torx or security bits you will not find in a standard drawer. A dedicated set means no stripped screws and faster teardowns.
Shop Screwdriver Sets on Amazon →Socket Wrench Set (Metric + Standard)
From dryer lint-trap screws to washing-machine motor bolts, a socket set covers the fasteners a screwdriver cannot. Metric and standard both — appliances use both.
Shop Socket Wrench Sets on Amazon →